Tuesday, September 30, 2008

Marquise Pendant gets Web Press x 2

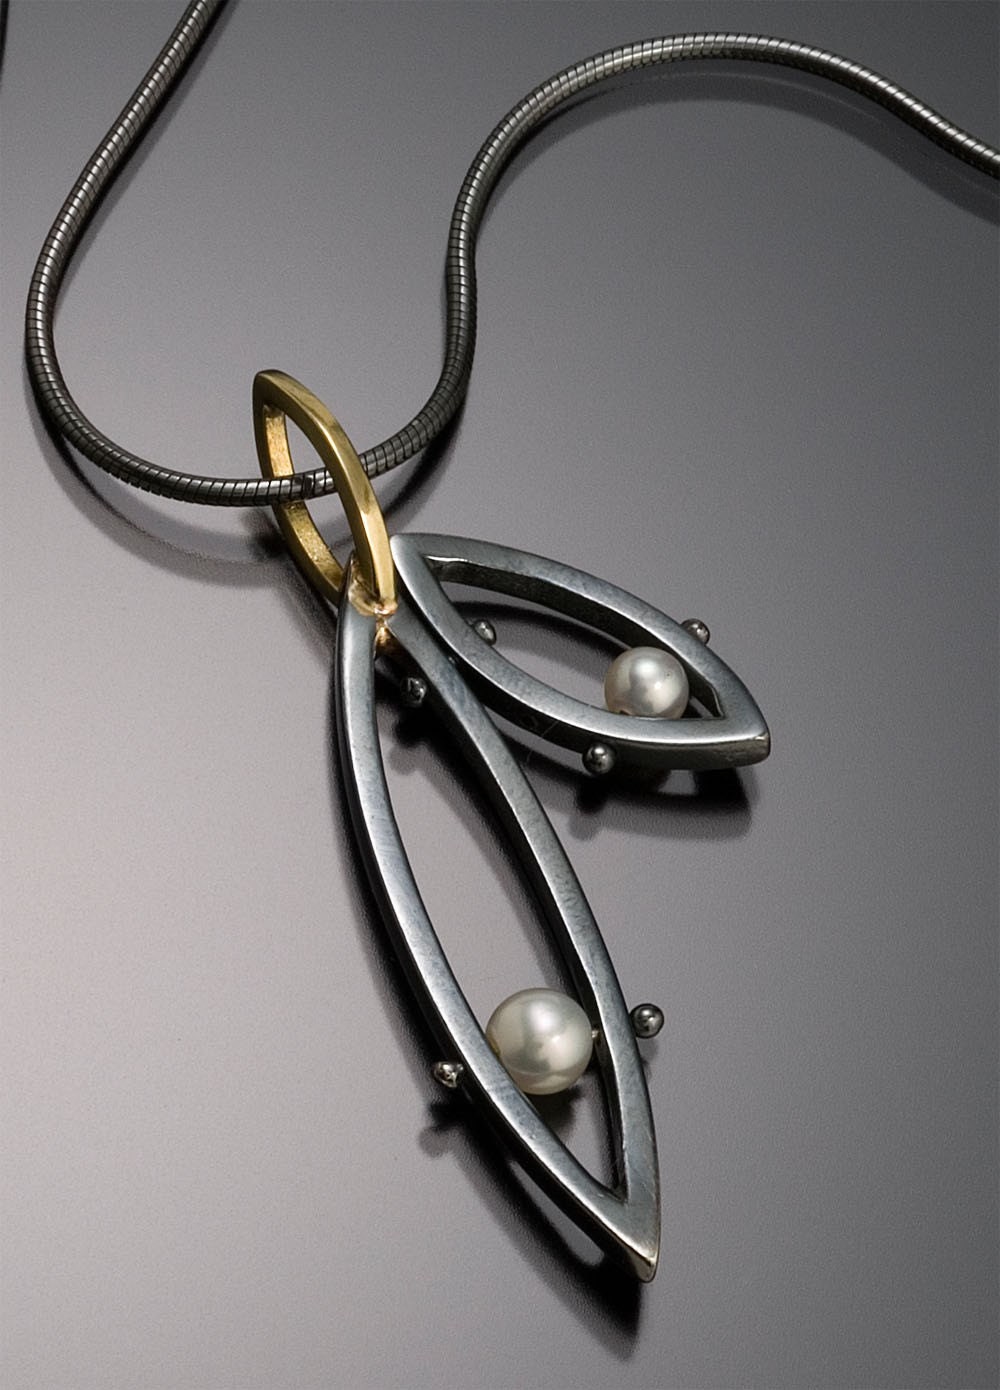
Jewelry of the Day is a wonderful blog for jewelry addicts! It features a daily selection of hand made jewelry with links to where you can purchase the items. And I'm happy to say that my Asymmetrical Marquise Pendant is the item of TODAY! Thanks for choosing my pendant!
-------------------------
The same pendant was featured yesterday on Etsy's The Storque article entitled Sterling Silver Jewelry!

Friday, September 26, 2008

Friday at the bench...


This week was busy with finishing and shipping lots of orders (wholesale and Etsy). I'm happy to say that next week I will be able to breathe a little easier and concentrate my my terribly neglected office work!


Today, Ben and I poured ingots and pulled wire for a custom ring I need to make. I will have plenty of wire left over, so be on the lookout for some new stacking rings in 14k white, yellow and pink gold... (well, when I'm done with my office work, anyway)

Thursday, September 25, 2008

I love Avery!

I have been wanting to use labels instead of writing on my bags with a Sharpie for years...
FINALLY! I did it! I love them! I just shipped 6 wholesale orders and they looked beautiful and professional! Thank you Avery DesignPro!

Wednesday, September 24, 2008

Back to School...

Back to School!
This sterling silver ring is such FUN!
The pencil actually spins like a propeller when you flick it!
I made this ring as part of etsymetal team's monthly theme... September's theme involved using the technique of riveting and the concept of green/recycle/upcycle.
I am happy and surprised to say that the ring sold quickly. Tell me what you think...should I make more????

Friday, September 19, 2008

Friday at the bench...

I think I'm going to TRY to start a new weekly posting about what I'm working on and the state of my studio. It may help get me motivated to clean up my workspace! Here goes...
I'm trying to finish up several wholesale orders that are a little behind schedule. (whoops!) I have to set the stones and add all the pearls today/this weekend so I can ship on Monday...
Each order gets a pie-shaped container & a sticky note. eeekkk! Do you think I need a better system? My chaos works for me...sort of...

Monday, September 15, 2008

Satellite Collection & A Blog nod...

Last week my original Satellite Ring was featured on panie przodem, a contemporary jewelry blog based out of Poland! It it a great honor to be included with such inspiring avant-garde jewelers. Thanks, Dominika!
With that said, I have also recently decided to resurrect my Satellite designs. In the past this collection has mainly been flatware (cocktail spoon, fork and martini sticks). Now, I am working on adding many new jewelry pieces. The first two are now available in my etsy shop.
Satellite Earrings #1

More Satellite designs coming soon...keep posted!

Friday, September 12, 2008

New Wedding Rings...

I made this ring a few months ago and really liked how it turned out. The body of the band has a high polish and the concave detail has a light texture. I called it my Reverse Radius Ring. I love the simplicity and geometry.
I thought it would make a great wedding band so here the results so far...


I am currently test marketing them in my etsy shop and will officially introduce them into the Spring 2009 Collection at the Buyers Market in February.

Wednesday, September 10, 2008

Results of the silversmithing workshop #5

To conclude the making of my bud vase...

Now that I have all my parts, I have to make them fit together! I file neck so it will sit flush on the top dome with little or no gaps. This takes a while: taking a little metal off here...checking the fit...taking a little metal off there...checking the fit ...and so on...

Once I have the fit perfect, I mark where I want to neck to be attached to the top dome and cut a hole into it.

Then stitches or burs are raised with a graver to hold the neck from moving (I will show you this a little later) and it is soldered into place.

The next step is to make a seat for the vase to sit on. I air raised a shallow dome into my larger bottom hemisphere.
Then the top inside egde is marked for placement and burs are raised to hold the two halves together during soldering. This technique of raising burs to keep things from sliding around was new to me and I love it! When I was taught in school, we used binding wire...which sometimes distorts your work and sticks to it. :(

It is soldered upside down so solder can be added to the lip (which will be removed later).

It's together!
The lip is sawed off and filed.

Lastly, the piece is heated, pickled and brass brushed many times over to raise the fine silver to the surface and give it this final finish. TA DA!

Wednesday, September 3, 2008

Results of the silversmithing workshop #4

The making of my base vase, continued...

The next step in making my bud vase was to sink my second disc. You do this by hammering the disc into a piece of wood with a shallow bowl chiseled out.
After I sunk it to my desired shape, I then planished it. Now that I have my two main parts, I have to trim and file the bottom hemisphere so it will can be soldered to the top dome.

The next step is to make the pieces for the neck of the vase. I decided to use the scrap left from cutting out my discs. I laid out the shapes in paper and glued them to my metal so I could accurately cut the pieces out. Then I formed them on a mandrel.

Once I had the neck pieces formed, I soldered them together.
Tomorrow I will show you how I finished the bud vase...

Tuesday, September 2, 2008

Results of the silversmithing workshop #3

I wanted to continue these postings about my silversmithing workshop last week...but other things came up! So I will continue today....

Here it is...my final project during the Brian Clarke silversmithing workshop...my bud vase!

I began by cutting out 2 sterling discs, annealing them and then began crimp raising one disc for the bottom half of the vase.


After several coures of raising, the shape is close to my template size.

Then I planished the hemisphere on a mushroom stake.


I wonder how many hammer blows it took to make it look like this? I wasn't counting! :) This portion of the bud vase took a full day (plus a few hours)...
I will continue with the top portion of the vase tomorrow...Have a good day!